> ## Documentation Index
> Fetch the complete documentation index at: https://docs.bytebase.com/llms.txt
> Use this file to discover all available pages before exploring further.
# State-based Schema Management with GitHub Actions and AI Review
This is part of our database deployment series with Bytebase:
* [Database GitOps with GitHub Actions](/tutorials/gitops-github-workflow)
* [Database GitOps with Azure DevOps Pipeline](/tutorials/gitops-azure-devops-workflow)
* [Database GitOps with GitLab CI](/tutorials/gitops-gitlab-workflow)
* [Database GitOps with Bitbucket Pipelines](/tutorials/gitops-bitbucket-workflow)
* State-based Database Schema Management with GitHub Actions (this one)
***
Learn to implement state-based database schema management using GitHub Actions and Bytebase. This approach declares the desired schema state and automatically generates necessary migrations, eliminating manual script writing.
**What you'll build:**
* Declarative schema definitions in SQL files
* AI-powered SQL reviews on pull requests
* Auto-deployment of state changes on merge to main
**Important:** State-based workflow currently only supports PostgreSQL.
## Repository
[https://github.com/bytebase/example-gitops-github-flow](https://github.com/bytebase/example-gitops-github-flow)
## Prerequisites
* A Bytebase instance (Bytebase Cloud or self-hosted)
* For self-hosted version, you need [Docker](https://www.docker.com/) to run Bytebase.
## State-based vs Migration-based
**Migration-based**: Write incremental scripts that transform the database step-by-step. You track which migrations have run.
**State-based**: Declare the desired schema state. The system automatically generates migrations by comparing current and desired states.
## Setup
### Step 1 - Set up Bytebase
Use [Bytebase Cloud](https://cloud.bytebase.com/) for instant setup without infrastructure management. CI/CD services can connect immediately.
**Best for:** Quick testing, evaluation, and small teams
Run Bytebase in Docker within your infrastructure:
```bash theme={null}
docker run --rm --init \
--name bytebase \
--publish 8080:8080 --pull always \
--volume ~/.bytebase/data:/var/opt/bytebase \
bytebase/bytebase:latest
```
**Network Access Options:**
* **For testing:** Use tools such as [ngrok](https://ngrok.com/) or [VS Code port forwarding](https://code.visualstudio.com/docs/editor/port-forwarding) to temporarily expose your local Bytebase to cloud CI/CD services. After exposing, configure the **External URL** in Bytebase **Settings > General**.
* **For production:** Use self-hosted CI/CD runners within your private network. Never expose production Bytebase to the internet.
**Best for:** Organizations with security requirements or existing infrastructure
See [Network Architecture guide](/get-started/self-host/network-architecture#2-self-hosted-bytebase-production).
### Step 2 - Create Service Account
1. Log in as `Workspace Admin`, and go to **IAM & Admin** > **Users & Groups**. Click **+ Add User**, fill in with `api-sample`, and assign the `Workspace Member` and `GitOps Service Agent` roles, which are sufficient for this tutorial, then click **Confirm**.
2. Find the newly created service account and **Copy Service Key**. We will use this token to authenticate the API calls.
 ### Step 3 - Fork the Example Repository and Configure Variables
1. Fork [https://github.com/bytebase/example-gitops-github-flow](https://github.com/bytebase/example-gitops-github-flow). There are two workflows in this repository for this tutorial:
* `.github/workflows/declarative-release-action.yml`: Deploy release in Bytebase after the PR is merged to the `main` branch.
* `.github/workflows/declarative-sql-review-action.yml`: [Lint the generated SQL](/sql-review/review-policy/) migration after the PR is created with AI configured.
2. Go into the workflow files and update the `env` section with your own values:
* **BYTEBASE\_URL**: Your Bytebase instance URL (e.g., `https://bytebase.your-company.com` or your Bytebase Cloud URL)
* **BYTEBASE\_SERVICE\_ACCOUNT**: `api-example@service.bytebase.com` (the service account you created in the previous step)
* **BYTEBASE\_PROJECT**: `projects/project-sample` (the sample project in Bytebase)
* **BYTEBASE\_TARGETS**: `instances/test-sample-instance/databases/hr_test,instances/prod-sample-instance/databases/hr_prod` (the two default databases in the sample project)
* **STATE\_FILE\_PATTERN**: `schemas/*.sql` (the pattern for state definition files)
The workflows run `bytebase-action check` and `bytebase-action rollout`, which verify
version compatibility before executing. For Bytebase Cloud, use
`bytebase/bytebase-action:cloud`; for self-hosted Bytebase, use the image tag matching
your Bytebase server version, for example `bytebase/bytebase-action:3.14.0`.
3. Add the service account password as a secret named **BYTEBASE\_SERVICE\_ACCOUNT\_SECRET** in **Settings > Secrets and Variables > Actions**.
4. The **`GITHUB_TOKEN`** is automatically provided by GitHub during workflow execution.
5. Go to **Actions** tab and enable workflow runs.
### Step 4 - Configure AI Review
1. Go to Bytebase console, click **Settings > General > AI Assistant**.
2. Enable AI and choose your provider (OpenAI, Azure OpenAI, Gemini, or Claude).
3. Enter your API credentials and test the connection.
4. Create a `.bytebase/sql-review.md` file in your repository and write your team's SQL standards in natural language - no special syntax required. Here is an example:
```markdown theme={null}
# .bytebase/sql-review.md
# SQL Review Standards
## 1. Table Naming Convention
- All table names must be in snake_case
```
1. Update `.github/workflows/declarative-sql-review-action.yml` to use the `.bytebase/sql-review.md` file.
```yaml theme={null}
...
run: |
bytebase-action check --url=${{ env.BYTEBASE_URL }} --project=${{ env.BYTEBASE_PROJECT }} --targets=${{ env.BYTEBASE_TARGETS }} --file-pattern=${{ env.FILE_PATTERN }} --declarative --custom-rules "$(cat .bytebase/sql-review.md)"
```
## Deploy the State Changes
### Step 1 - Export the Schema Definition File
State-based workflows use SQL files that define the complete desired schema.
1. To manage existing schemas, export them from Bytebase console: navigate to your database and click **Export Schema**.
2. Navigate to `Sample Project` > **Database > Databases**. Select `hr_prod` and export the schema:
```sql theme={null}
COMMENT ON SCHEMA "public" IS 'standard public schema';
CREATE TABLE "public"."audit" (
"id" serial,
"operation" text NOT NULL,
"query" text,
"user_name" text NOT NULL,
"changed_at" timestamp(6) with time zone DEFAULT CURRENT_TIMESTAMP,
CONSTRAINT "audit_pkey" PRIMARY KEY (id)
);
...
```
3. Add a new table, save as `schema.sql` in the `schemas/` directory:
```sql theme={null}
CREATE TABLE "public"."fakeTable" (
"id" serial,
"name" text NOT NULL
);
```
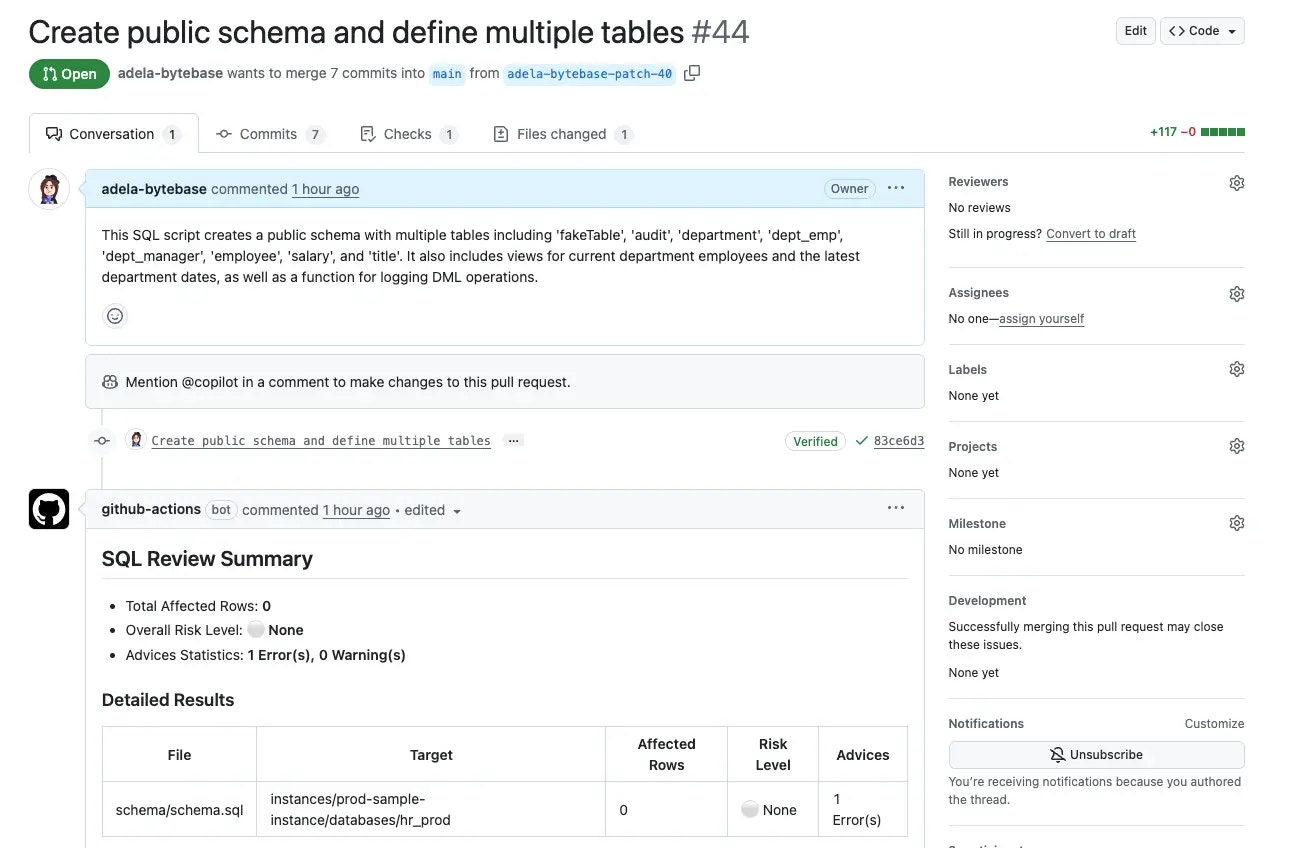
### Step 2 - Create a Pull Request
1. Create a pull request from your branch. The workflow triggers automatically, posting review results as PR comments.
### Step 3 - Fork the Example Repository and Configure Variables
1. Fork [https://github.com/bytebase/example-gitops-github-flow](https://github.com/bytebase/example-gitops-github-flow). There are two workflows in this repository for this tutorial:
* `.github/workflows/declarative-release-action.yml`: Deploy release in Bytebase after the PR is merged to the `main` branch.
* `.github/workflows/declarative-sql-review-action.yml`: [Lint the generated SQL](/sql-review/review-policy/) migration after the PR is created with AI configured.
2. Go into the workflow files and update the `env` section with your own values:
* **BYTEBASE\_URL**: Your Bytebase instance URL (e.g., `https://bytebase.your-company.com` or your Bytebase Cloud URL)
* **BYTEBASE\_SERVICE\_ACCOUNT**: `api-example@service.bytebase.com` (the service account you created in the previous step)
* **BYTEBASE\_PROJECT**: `projects/project-sample` (the sample project in Bytebase)
* **BYTEBASE\_TARGETS**: `instances/test-sample-instance/databases/hr_test,instances/prod-sample-instance/databases/hr_prod` (the two default databases in the sample project)
* **STATE\_FILE\_PATTERN**: `schemas/*.sql` (the pattern for state definition files)
The workflows run `bytebase-action check` and `bytebase-action rollout`, which verify
version compatibility before executing. For Bytebase Cloud, use
`bytebase/bytebase-action:cloud`; for self-hosted Bytebase, use the image tag matching
your Bytebase server version, for example `bytebase/bytebase-action:3.14.0`.
3. Add the service account password as a secret named **BYTEBASE\_SERVICE\_ACCOUNT\_SECRET** in **Settings > Secrets and Variables > Actions**.
4. The **`GITHUB_TOKEN`** is automatically provided by GitHub during workflow execution.
5. Go to **Actions** tab and enable workflow runs.
### Step 4 - Configure AI Review
1. Go to Bytebase console, click **Settings > General > AI Assistant**.
2. Enable AI and choose your provider (OpenAI, Azure OpenAI, Gemini, or Claude).
3. Enter your API credentials and test the connection.
4. Create a `.bytebase/sql-review.md` file in your repository and write your team's SQL standards in natural language - no special syntax required. Here is an example:
```markdown theme={null}
# .bytebase/sql-review.md
# SQL Review Standards
## 1. Table Naming Convention
- All table names must be in snake_case
```
1. Update `.github/workflows/declarative-sql-review-action.yml` to use the `.bytebase/sql-review.md` file.
```yaml theme={null}
...
run: |
bytebase-action check --url=${{ env.BYTEBASE_URL }} --project=${{ env.BYTEBASE_PROJECT }} --targets=${{ env.BYTEBASE_TARGETS }} --file-pattern=${{ env.FILE_PATTERN }} --declarative --custom-rules "$(cat .bytebase/sql-review.md)"
```
## Deploy the State Changes
### Step 1 - Export the Schema Definition File
State-based workflows use SQL files that define the complete desired schema.
1. To manage existing schemas, export them from Bytebase console: navigate to your database and click **Export Schema**.
2. Navigate to `Sample Project` > **Database > Databases**. Select `hr_prod` and export the schema:
```sql theme={null}
COMMENT ON SCHEMA "public" IS 'standard public schema';
CREATE TABLE "public"."audit" (
"id" serial,
"operation" text NOT NULL,
"query" text,
"user_name" text NOT NULL,
"changed_at" timestamp(6) with time zone DEFAULT CURRENT_TIMESTAMP,
CONSTRAINT "audit_pkey" PRIMARY KEY (id)
);
...
```
3. Add a new table, save as `schema.sql` in the `schemas/` directory:
```sql theme={null}
CREATE TABLE "public"."fakeTable" (
"id" serial,
"name" text NOT NULL
);
```
### Step 2 - Create a Pull Request
1. Create a pull request from your branch. The workflow triggers automatically, posting review results as PR comments.
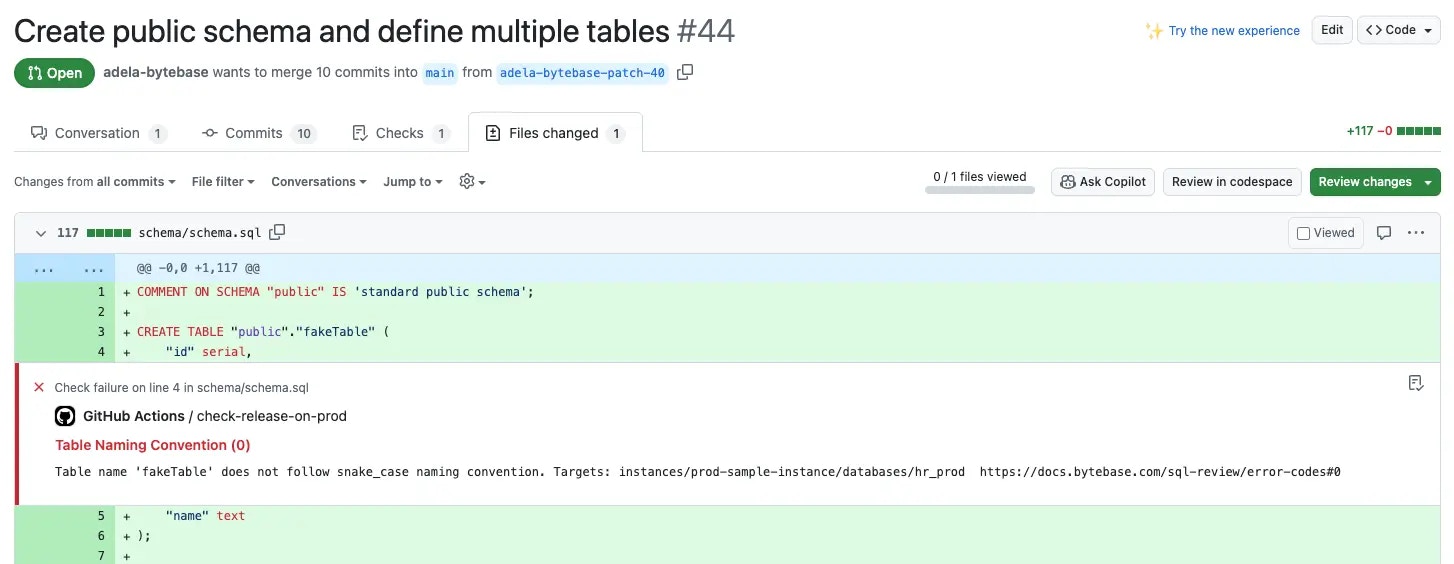 2. Fix the naming convention warning by updating the table name:
```sql theme={null}
CREATE TABLE "public"."fake_table" (
"id" serial,
"name" text NOT NULL
);
```
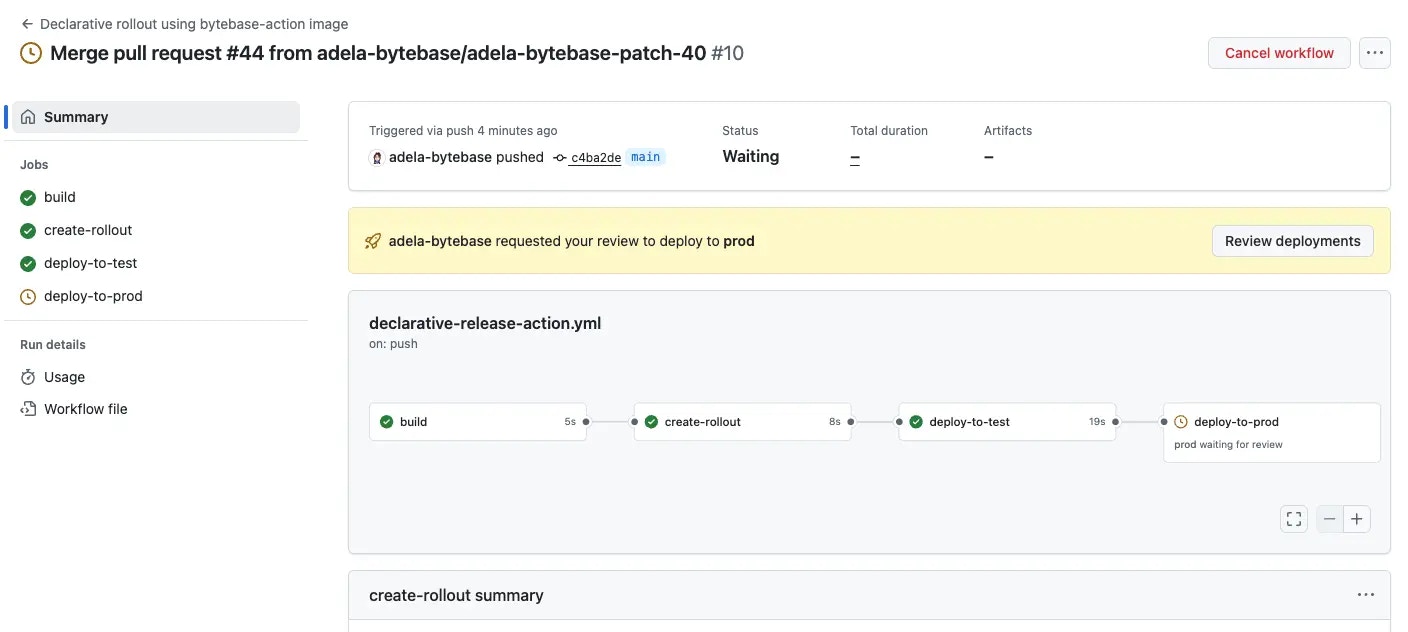
### Step 3 - Merge the Pull Request
1. Push the fix. Once the review passes, merge the PR.
2. Check the **Actions** tab - test deploys automatically, prod awaits approval.
2. Fix the naming convention warning by updating the table name:
```sql theme={null}
CREATE TABLE "public"."fake_table" (
"id" serial,
"name" text NOT NULL
);
```
### Step 3 - Merge the Pull Request
1. Push the fix. Once the review passes, merge the PR.
2. Check the **Actions** tab - test deploys automatically, prod awaits approval.
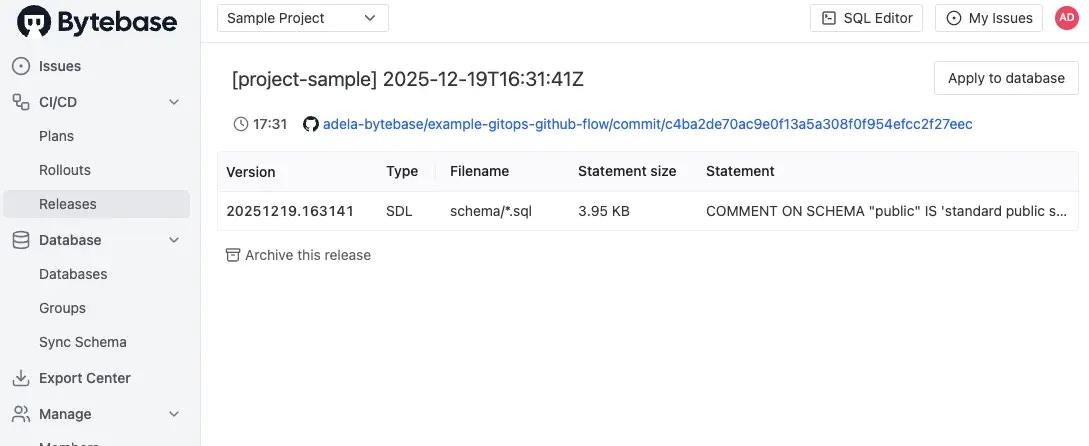
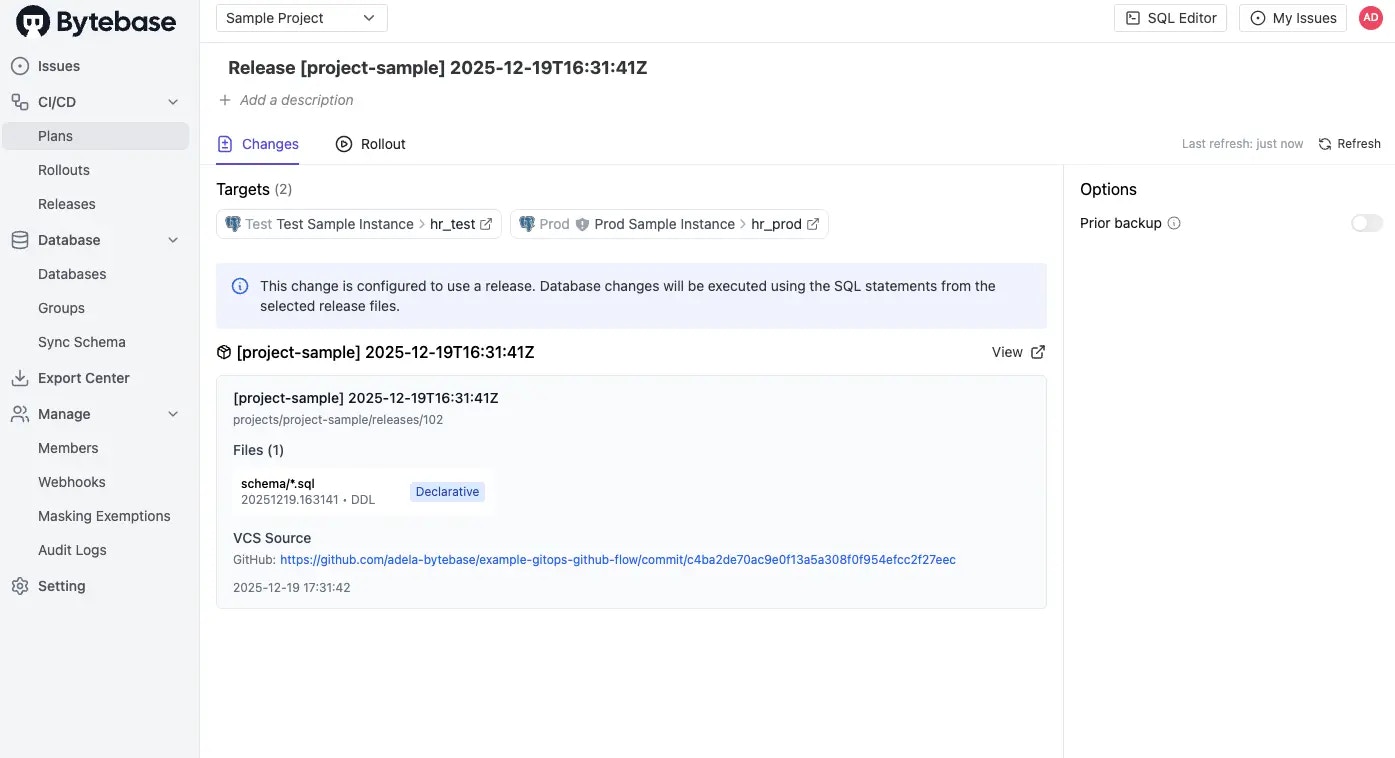
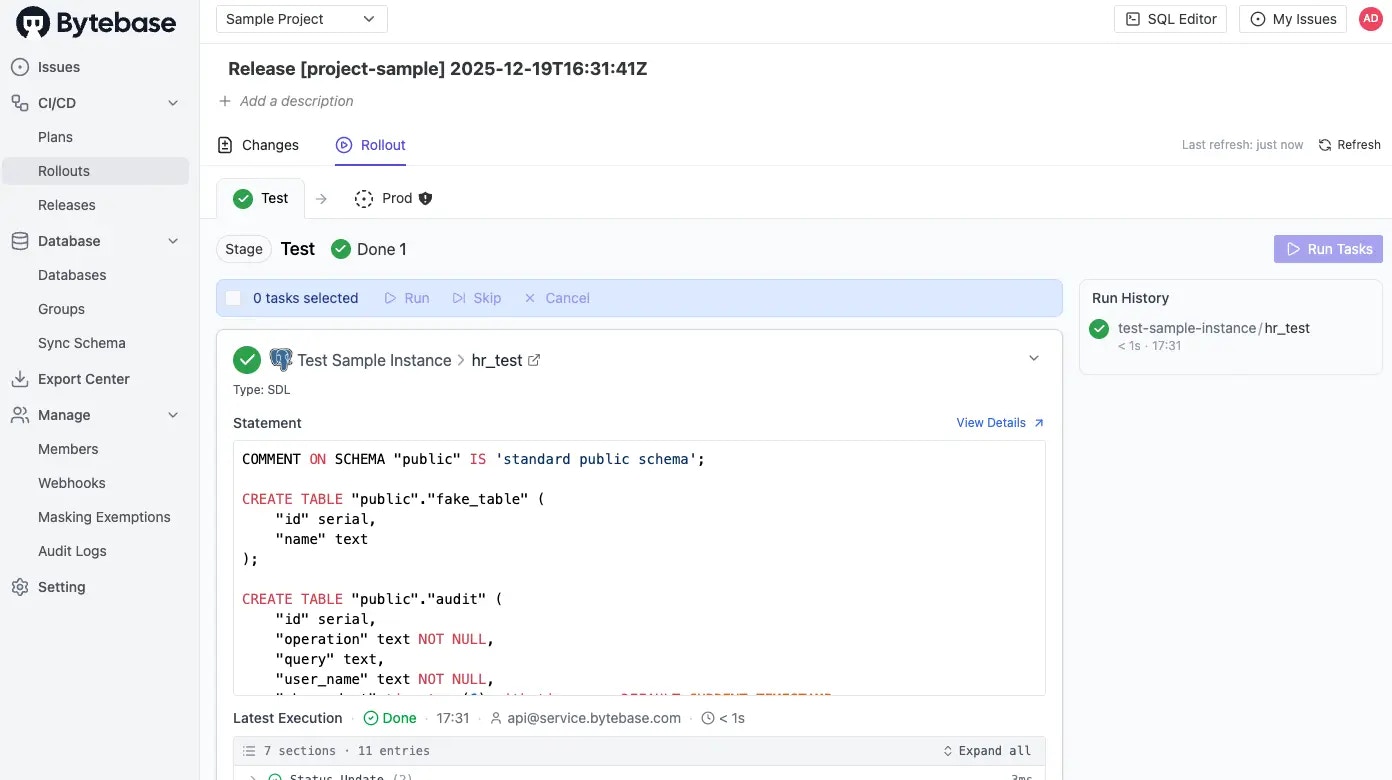
 3. In Bytebase console, verify the release was created and applied to `hr_test`.
 4. Return to GitHub **Actions** and approve the production deployment.
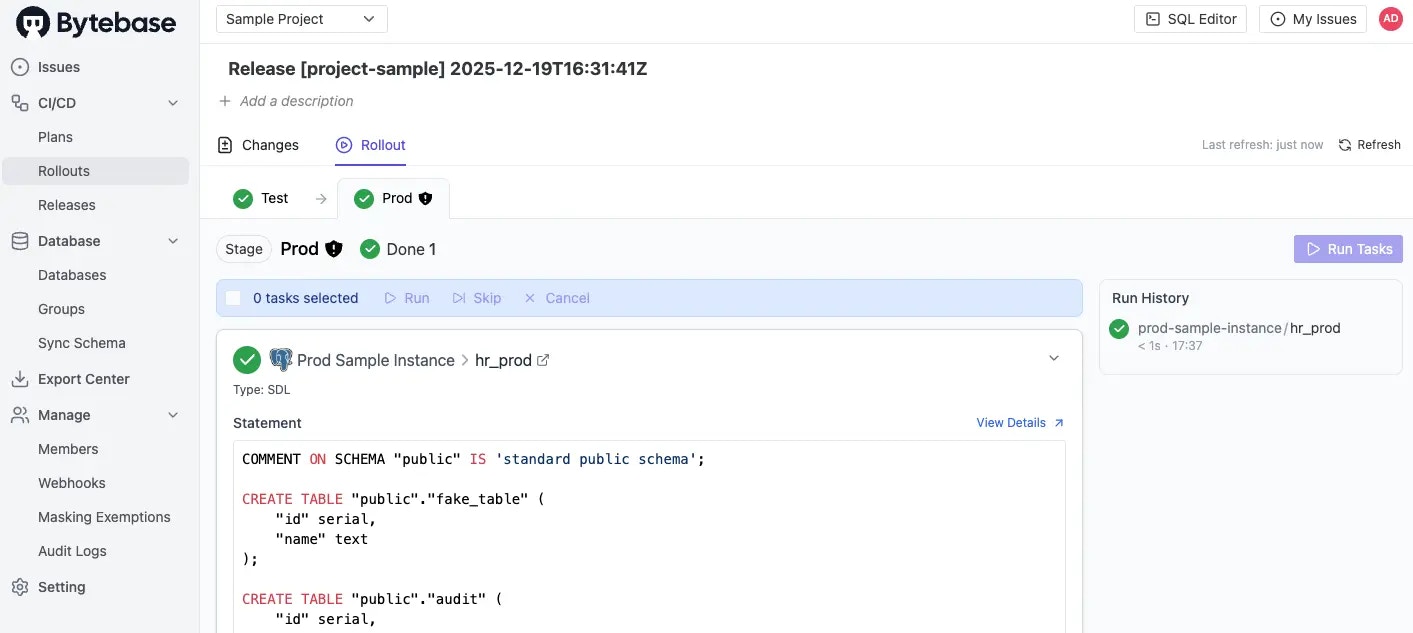
5. Confirm the changes are applied to `hr_prod` in Bytebase.
4. Return to GitHub **Actions** and approve the production deployment.
5. Confirm the changes are applied to `hr_prod` in Bytebase.
 ## Summary
You've successfully implemented state-based schema management with GitHub Actions, enabling declarative database changes with AI-powered reviews and automated deployments.
## Summary
You've successfully implemented state-based schema management with GitHub Actions, enabling declarative database changes with AI-powered reviews and automated deployments.